Hey ya’ll! As promised during last week’s kitchen reveal, today I’m finally sharing how I painted the tile countertop that’s in part of our little kitchen.
And I’m so excited…..this is a project that I’ve been wanting to do for a really long time!
Real talk: I’ve been karate chopping my tile countertop every time I walk by it for nearly a year. Virginia hate countertop.
So, first things first, a little back story.
When we first moved into this house, this is what the kitchen looked like. It wasn’t perfect, but relative to the other options in our price range, I was pretty excited. The countertops were granite tile, the cabinets were white, and the floors were a nice gray tile.
All of the other houses in our price range had formica countertops, linoleum floors, or beige appliances. So, although this kitchen was small and still needed some work, I loved it.
This is actually the picture that was in the real estate listing.

The only thing that I really disliked from the start was the mosaic tile countertop that was on our look through bar area on the opposite side of the kitchen. It just felt kinda dated.
Here’s what it looked like around the time we moved in.

And here’s what it looked like standing in the dining room and looking into the kitchen.

I had been looking all over the place for some sort of way I could update this little area. My first attempt was to try to just paint some of the tile with latex paint. I coated it with polycrylic, but it totally didn’t last. So, total fail on that idea.
You win some, you lose…your mind sometimes.

So, I went back to searching for something that would last longer. And that’s when I found something awesome.
Something that actually worked.

The results were absolutely amazing, and it wasn’t very hard to do at all. In fact, it was only two steps.
I used a product called Homax Tough Tile Tub & Sink Refinishing Kit.
I read the reviews online and people didn’t seem to like the results when it was used on tubs, but I decided to try it anyways. And let me tell you, I’ve now painted a sink, a tile countertop in the kitchen, and a tile countertop in the bathroom. And all three turned out pretty awesome. Obviously, it’s not going to be as durable as real tile or a real sink, but for $30, total win in my book.

I found my kit at Home Depot for about $35, but the kit is cheaper online.

This kit comes with several parts. Please read the instructions very carefully.
**This stuff is very toxic and you’ll need to take the proper precautions. It’s an epoxy, so you’ll want to wear rubber gloves (included in the kit), a high quality mask, and protective eye wear.**
I also opened all of the windows in the house to allow for adequate ventilation. Our tiled countertop is right next to an exterior door and two giant windows. I had them open the entire day. Being able to do so really helped to lessen the intensity of the fumes.
DO NOT BREATHE THIS PRODUCT IN.
It is crucial that you wear a proper mask. The fumes are so strong and won’t dissipate for a good 24 hours. I painted my tile in the morning so that we could leave the house for the rest of the day.
The first thing the instructions tell you to do is to clean the tile with the solution provided. It comes with a packet of powder. I used a large bucket to mix the powder with water, and then just washed the countertop with the solution and a small rag.

After my tile was dry, I used some masking tape to tape around the wood trim that surrounds my tile, to keep it from getting painted. (Make sure to remove the tape before your final coat of of epoxy dries)
The kit comes with a paintbrush and epoxy paint.
I started on one side of the tile and just brushed on the product. You will see brushstrokes at first, but they leveled out on their own very quickly. I worked my way from side to side with the epoxy paint, brushing a light coat of the product over all the tile and grout.

Here I am, finishing up the first coat. With just one coat, you’ll still probably be able to see your tile underneath. Let the first coat dry for a couple hours, and then apply a second coat.
Next time Jesse takes me on a date, I’m totally wearing this outfit.
Get ready, husband.

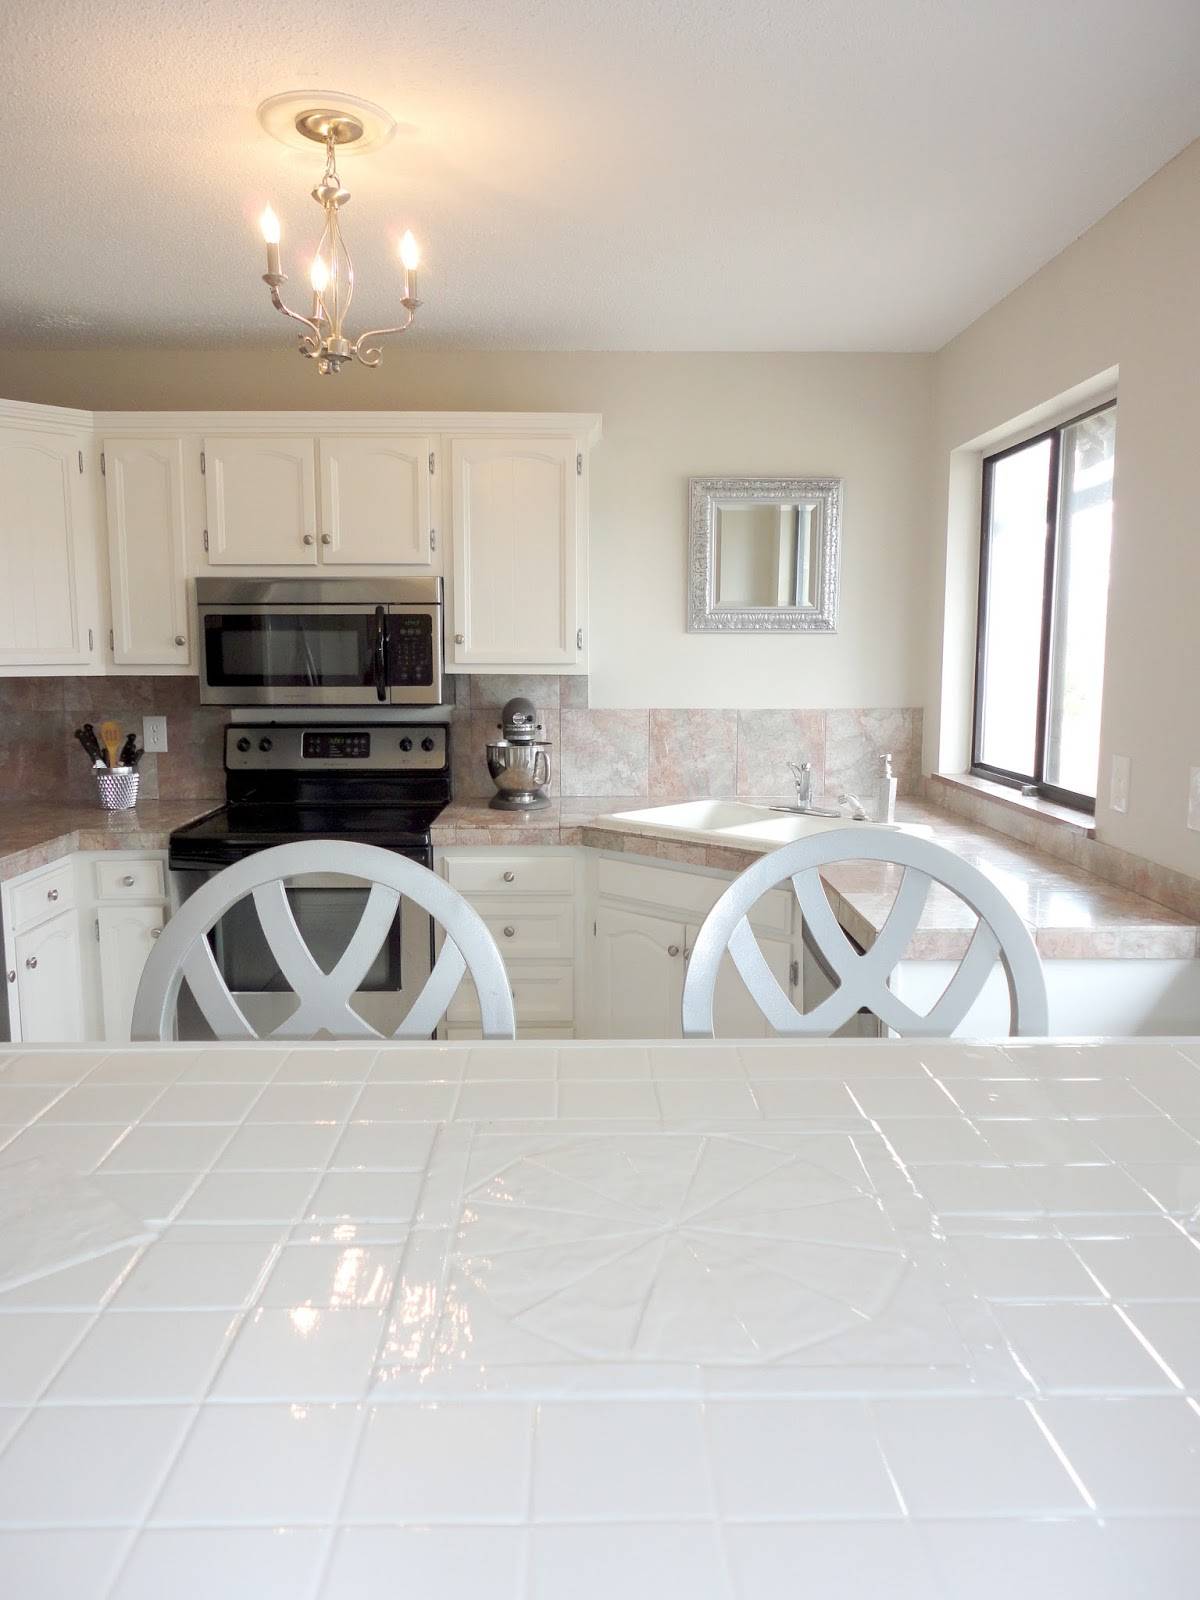
After the second coat dried, this is what my countertops looked like.

Two coats totally did the trick and was plenty to cover my tile and provide a great looking finish. You may need less or more coats, depending on the surface you paint.

The instructions said the epoxy paint would cure in a few days. In my experience, it took a lot longer. It was fully cured after about a week. It was frustrating to have to wait so long, especially when the instructions said it would take a few days, but ultimately I was pleased with the final outcome.
In the week it took to dry, my cats managed to dig their claws into it several times, so I’ll have to touch it up in a few spots eventually.
Tootie and Cheese desperately need kitten mittens.
Overall I love the way this turned out, and it totally updated my countertop and made it fit in better with the rest of the kitchen.


It’s no longer a total eye sore. And I no longer have to karate chop it. Mission accomplished.


So, what do you think?


Source: http://www.livelovediy.com/