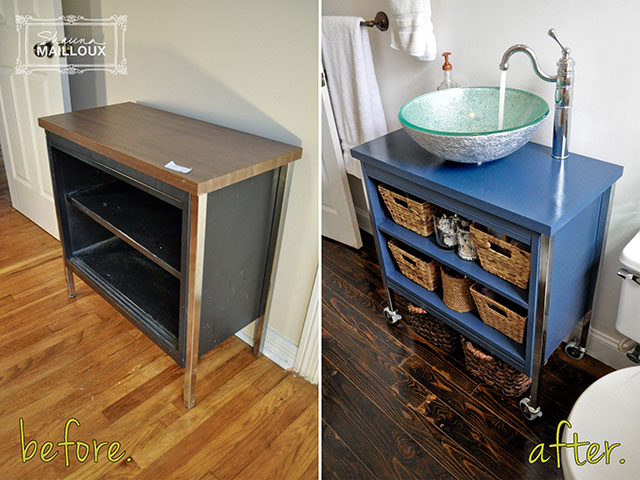
I think it’s about time to put an end to this vanity saga! For those of you who haven’t seen Part 1 or 2, or don’t remember because it was SO very long ago, Part 1 was cutting & drilling access for plumbing & repairing/replacing the shelves –
Part 2 was repairing the glass vessel sink I got on clearance, and painting & sealing the cabinet –
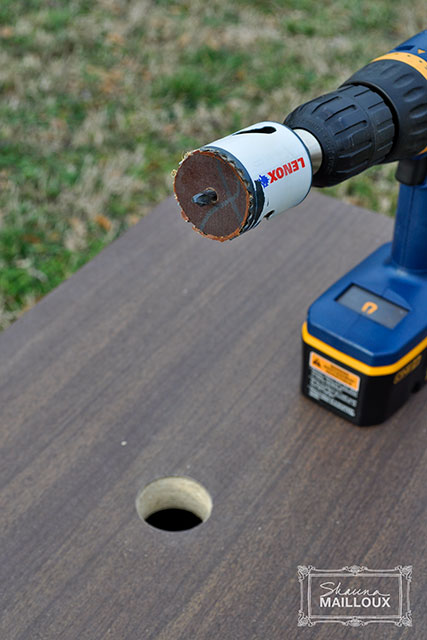
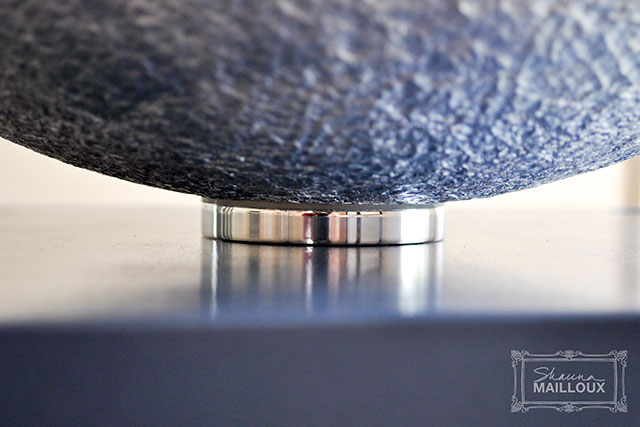
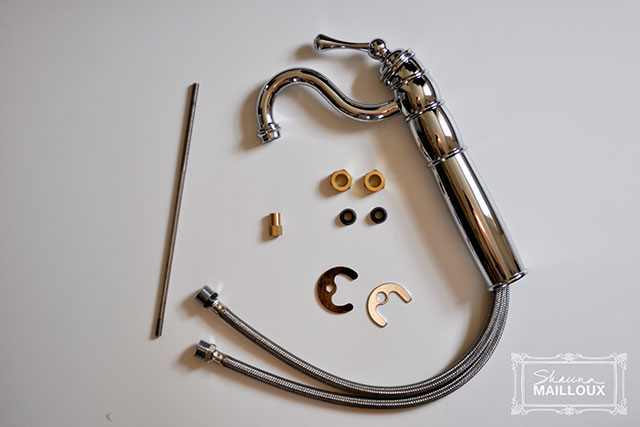
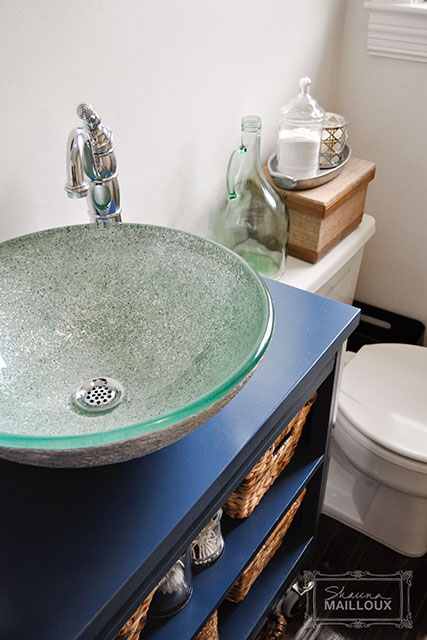
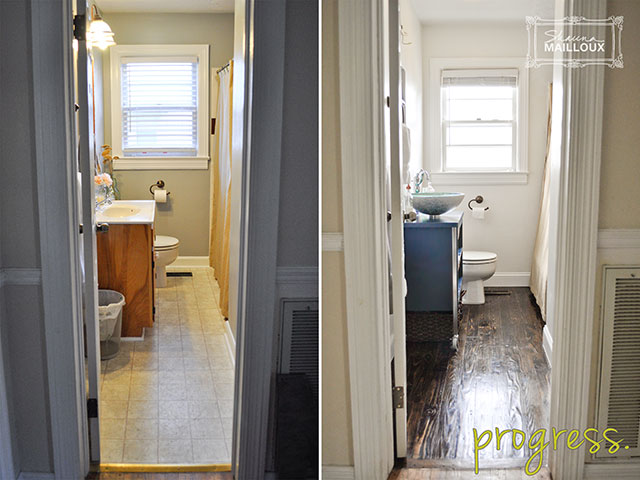
At this point, with our walls painted & our floors completed, we were ready for the big installation. Glass vessel sinks require mounting rings, I’m guessing because they are concave & help to support the weight of the sink with the compression of the tightened drain better than if it were just resting on one point.
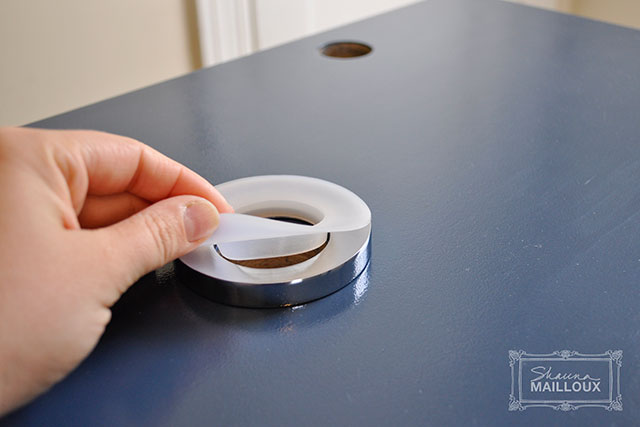
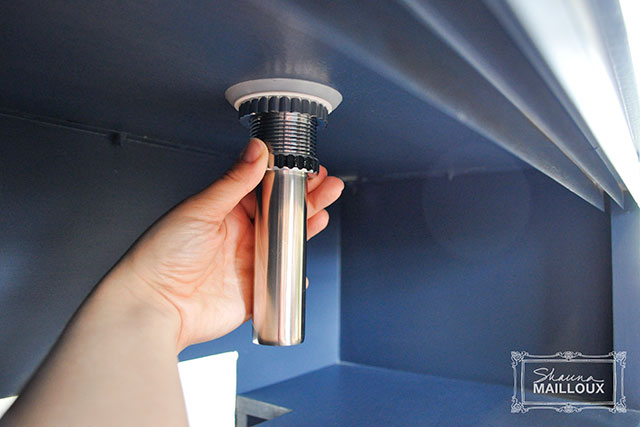
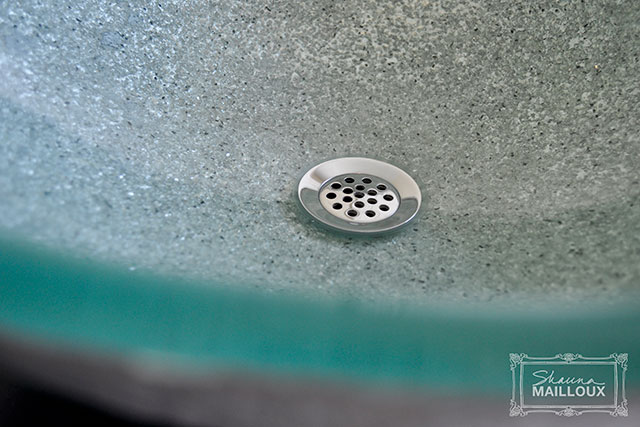
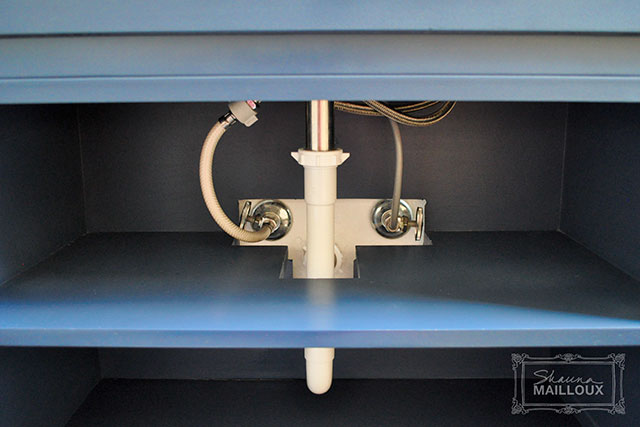
Ours came with the drain that we got on Overstock. We went with a grid drain because we thought it would be easier to install than a pop-up drain.
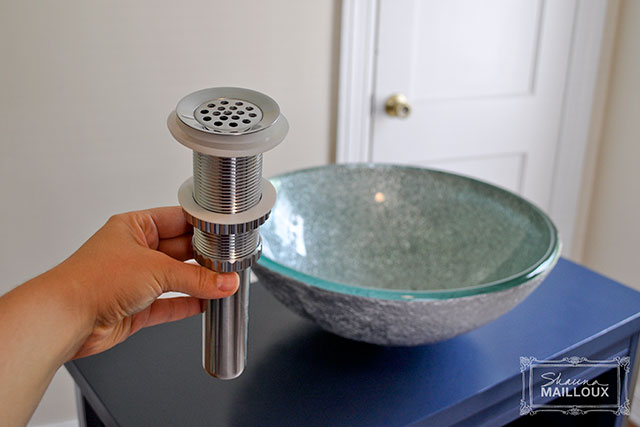
We are happy with it, but now that we are slightly more knowledgeable about plumbing, I think next time we would probably get the umbrella pop-up kind because they drain faster than the grid style.
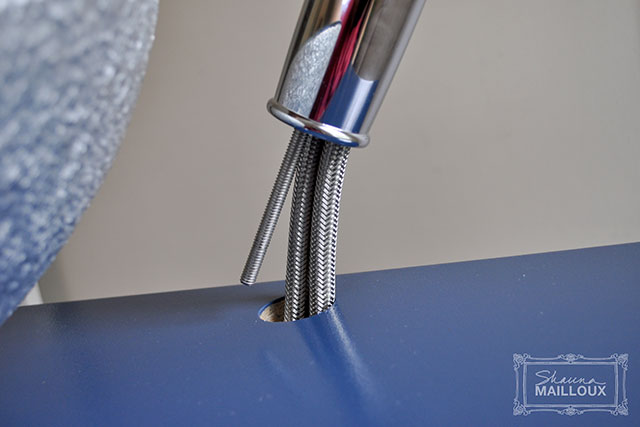
Then I installed our beautiful beast of a faucet (again, from Overstock) according to instructions. I found this article pretty helpful throughout this entire process, as well as mannnny youtube videos!
Now it’s ready to be wheeled into the bathroom & installed. It is pretty handy having a vanity that you can cart around until you’re ready to install it.
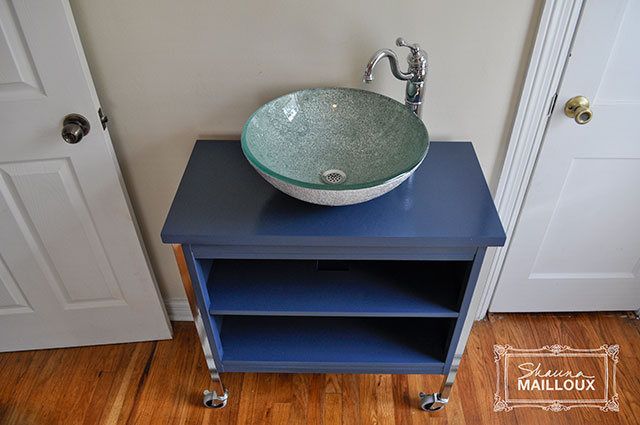
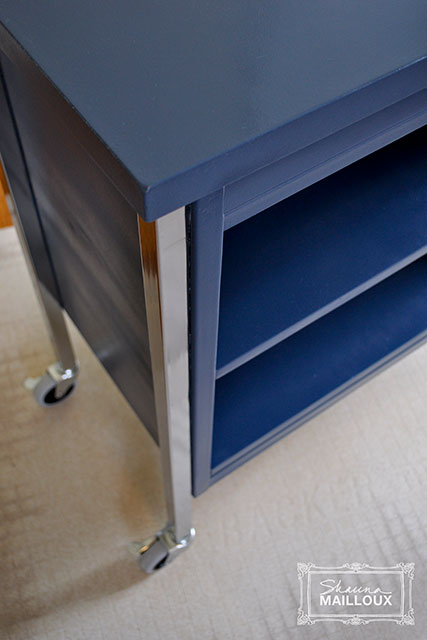
Once we had it in position, we obviously locked the casters, but for true stability, the entire cabinet was screwed to the wall in a few spots through a block of wood in between the wall & vanity.
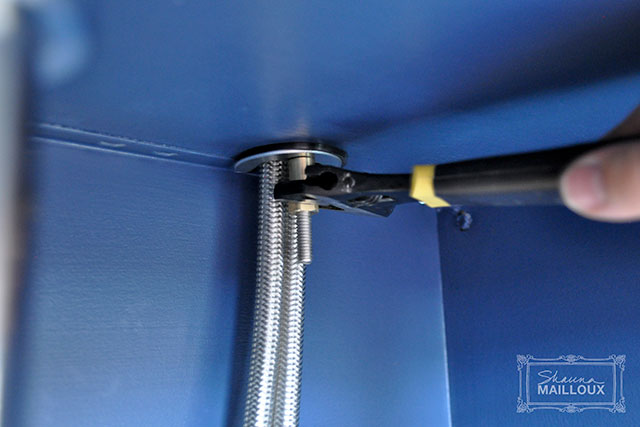
The rest of the plumbing was no easy task for us first-timers, but mannnnny weeks later after plenty of wrong parts & leaks, we have a functioning, leak-free sink! We decided to reuse as much as we could & not get all chrome plumbing parts because we realized that you really didn’t see it once everything else was in place. So even though you should typically go with the “pretty” plumbing in an open vanity like this, we figured it was an area that we could save a little money.
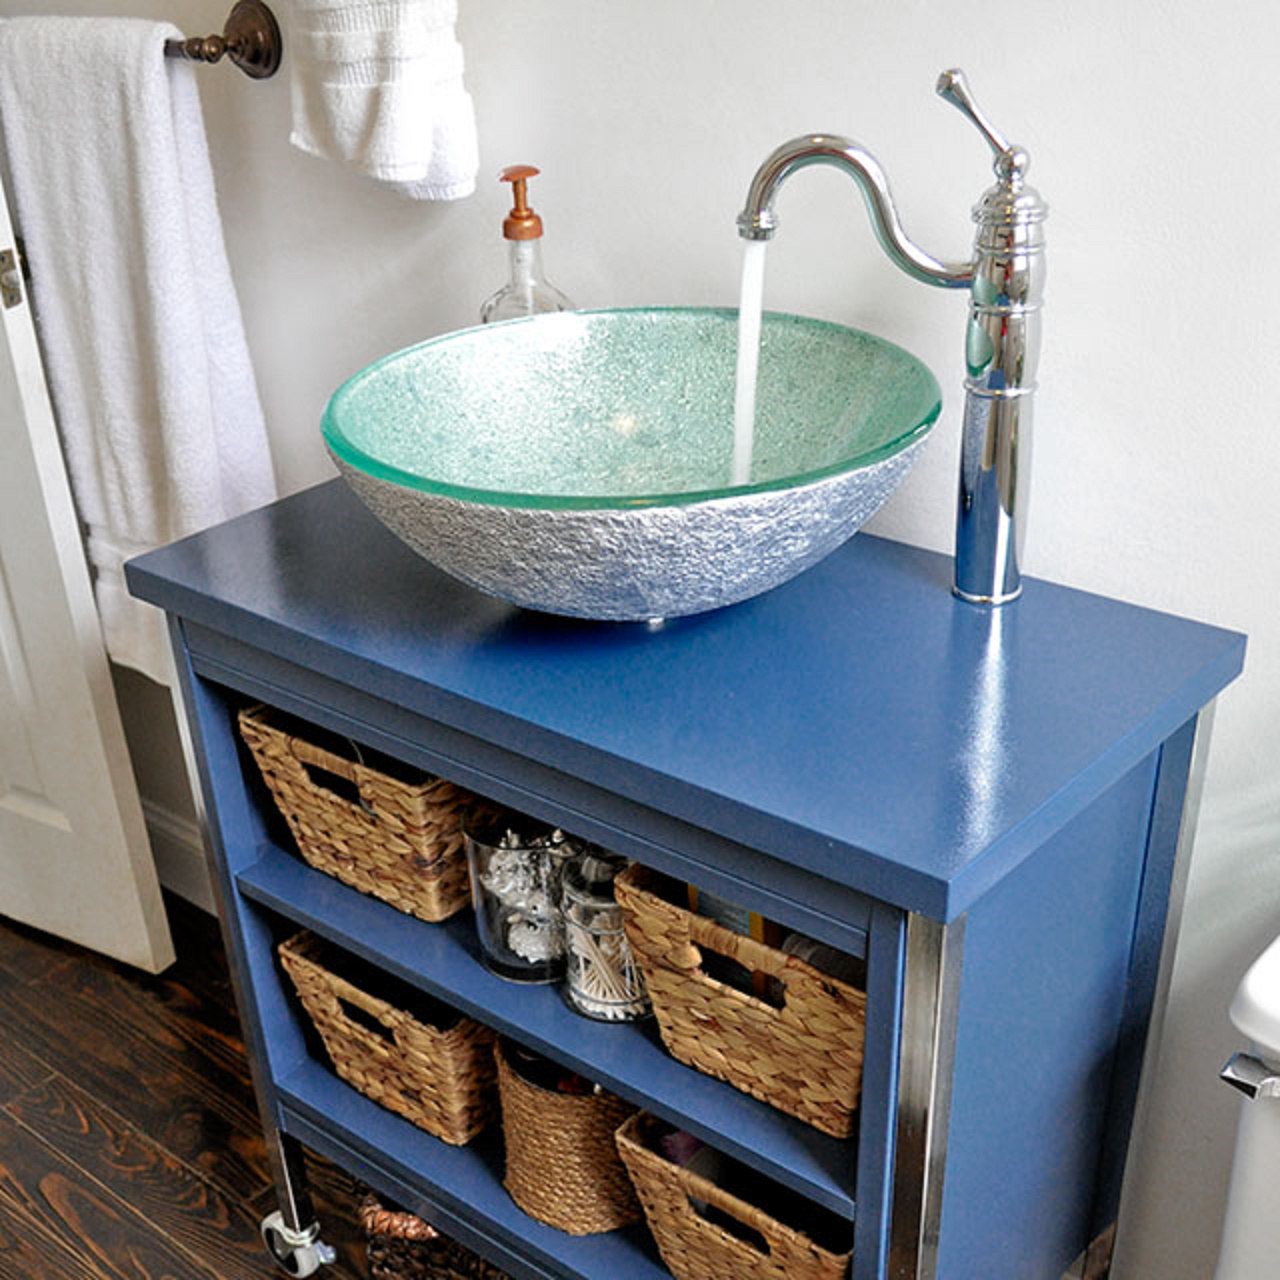
Look at that faucet. Isn’t she a beaut?
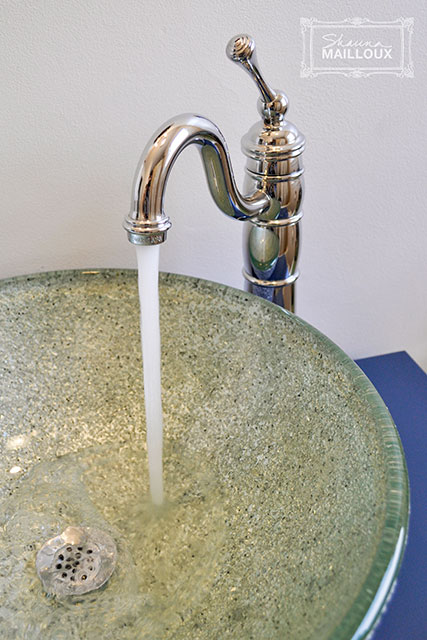
I could not be happier with the faucet. I love the vintage flair, & it seems so fancy to us. In a budget conscious makeover, I really like having a show-stopping piece like that to help the room from feeling too cheap.
Then came the fun part – pretty baskets for organizing! Here she is all done –
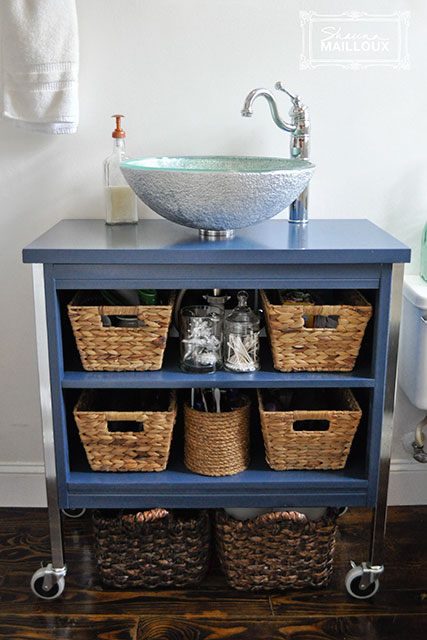
It may not seem like a ton of space, but it is very functional & I have been able to store WAY more stuff in this vanity than the old one, so I am pleased! The four water hyacinth baskets are from Lowe’s, & the two dark brown woven baskets underneath are from Michaels. I’ll be honest – Phil has 1.5 baskets, & I took over the rest!

The round basket is just rope hot glued around a large hot chocolate container. It fits perfectly in the space in front of the pipes, and it was free for me to make!

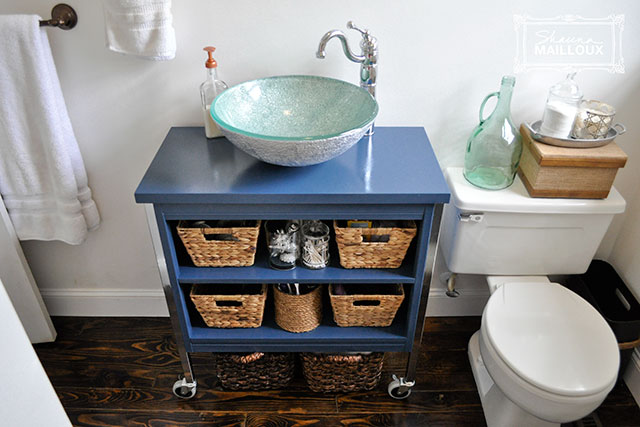
The cabinet is 4 inches shallower than the old vanity, which doesn’t sound like a lot, but I think it makes a huge difference in our tiny bathroom.
We really love the new set up. It makes us feel fancier than we are, haha, even though this whole project is very affordable for a unique, custom piece. Here’s the breakdown –
Cabinet $7.50
Paint & primer $23.50
Lacquer $ free (already owned)
Casters $24
Wood $15
Sink $30
Faucet $122
Drain & mounting ring $35
Extra plumbing parts $10
Storage baskets $60
TOTAL: $327
$239 is what we actually paid out of pocket, if you include the coupons, credit card rewards, & gift cards that we applied to different items. And we’ll take the storage baskets with us when we move, so I tell myself that they don’t count…
Regardless, it definitely came a long way from where it was –
Yep, we are slowly inching along! I’ll share the mirror, medicine cabinet, & light fixture makeovers next!
P.S. I finally have my etsy shop up & running! You can get there from the little etsy logo in the sidebar, or by clicking any of the items displayed on the right.
I also added a “Shop” tab to the top of the page where you can check out individual items, and click to view or purchase on etsy!